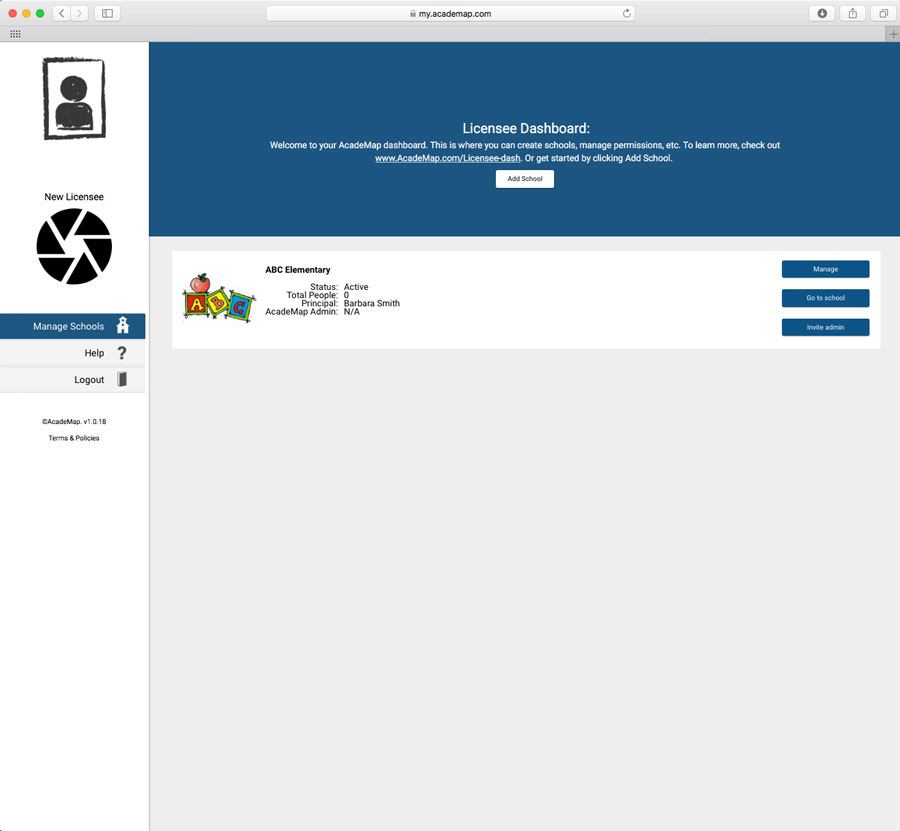
Dashboard
The Licensee Dashboard is where you will land each time you login. Here is where you will update your Licensee information as well as add/update your schools.

Update Licensee Info
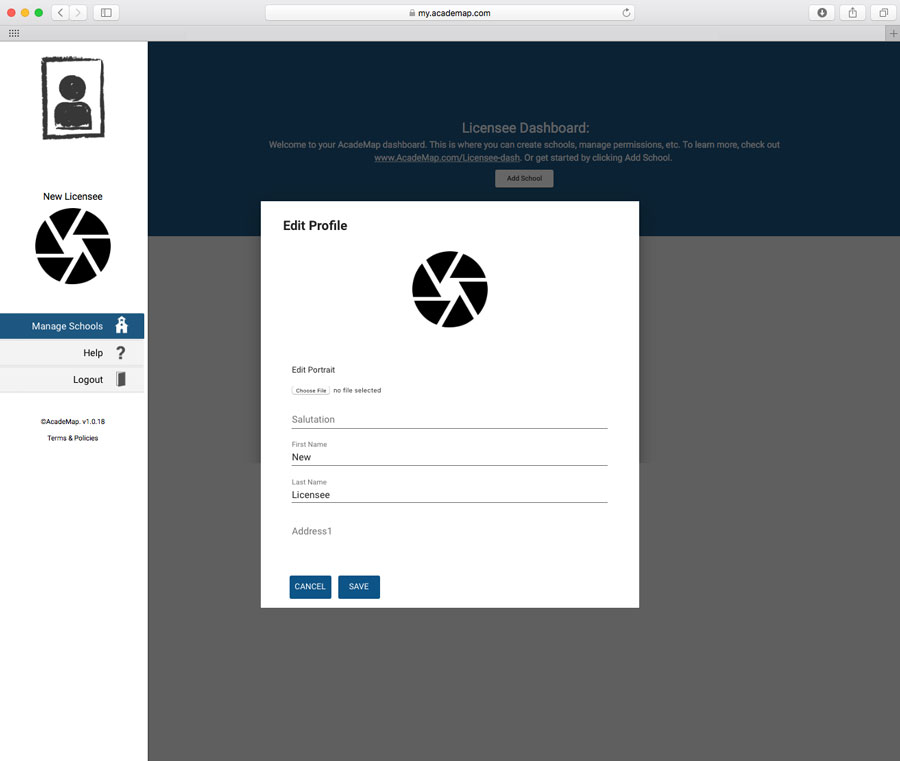
The first time you login you will need to update your Licensee Profile information. To do this, click on the Avatar on the left just below your company name.
The first thing you will want to do is add your company logo. Click on the Choose File button under Edit Portrait and select your logo. Make sure it is a 600 x 600 pixel PNG file with a transparent background.
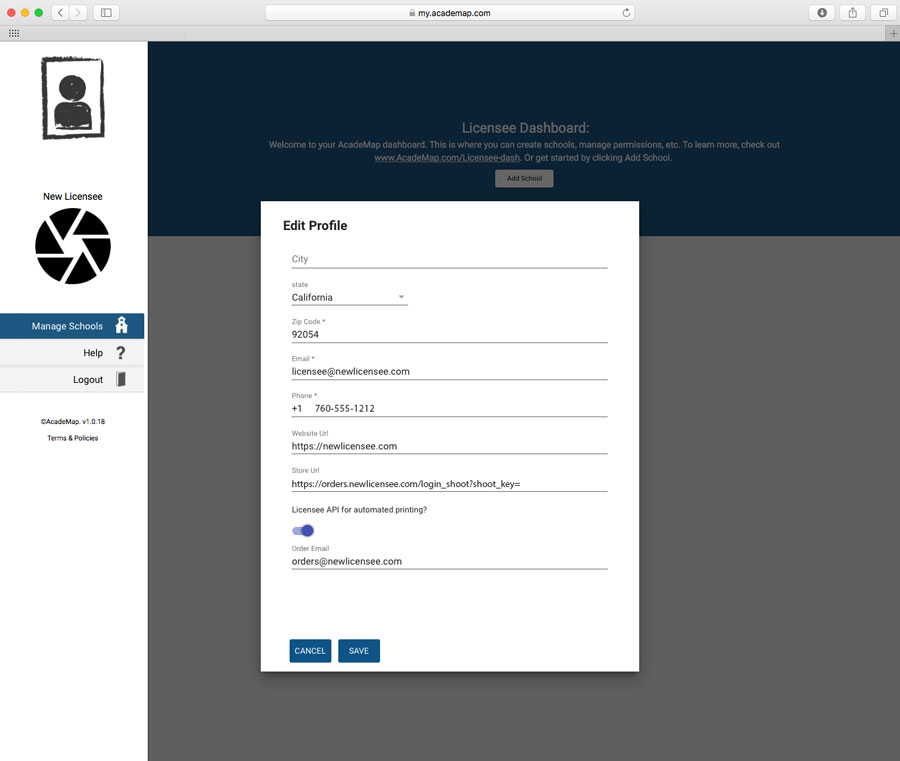
Next you will want to add your Website URL and your Store URL. The Store URL is the URL web address of your online store, which contains everything up to, but not including, the actual Shoot Key.
example: https://orders.newlicensee.com/login_shoot?shoot_key=
You can turn on the Licensee API for automated printing toggle if you plan to enable your schools to send Certificates and/or IDs directly to you to have them printed, as opposed to the schools printing the items themselves.
If you enable this option, then you will need to provide an Order Email. This is the email where Certificates and/or IDs will be sent to be processed by you.
Add School
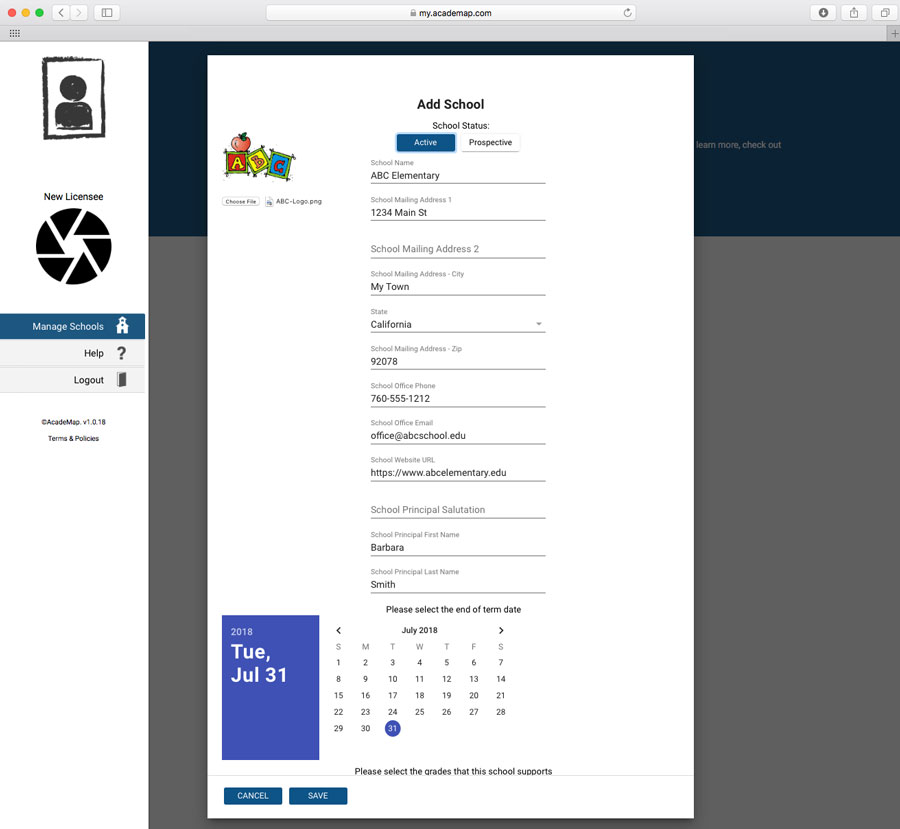
To add a school, click on the Add School button at the top of your Dashboard.
Fill in all of the school’s information including Name, Address, Phone, Email, Website, and Principal. Also, you will want to add the school’s logo as well. Click on the Choose File button on the left and upload the school’s logo. Make sure it is a 600 x 600 pixel PNG file with a transparent background.
Next, select the End of Term Date. This is the date at which time the school’s term expires and everyone “Graduates” to the next grade. The highest grade moves to the Alumni “archive”.
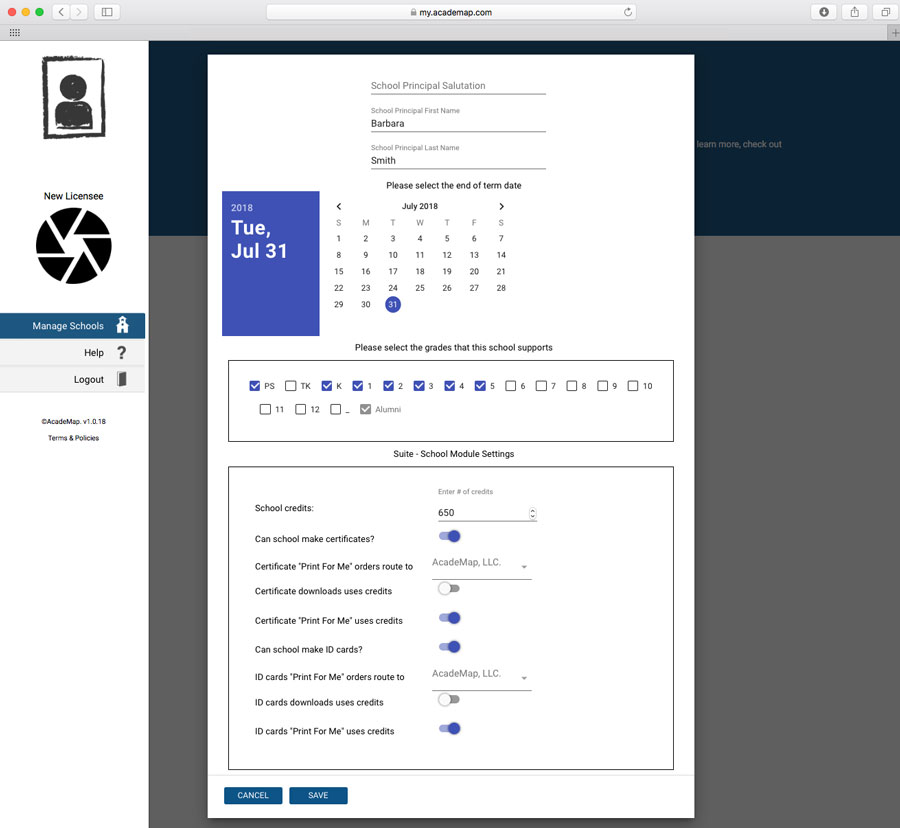
Next you will select the grades that this school supports.
Next you will choose which School Module Settings you will want available to the school in their Suite.
School Credits:
Credits are used for limiting the number of Certificates and/or IDs that can be ordered by the school. Usually equal to the number of students at the school.
Can school make certificates?:
Toggle “On” (blue) for “Yes”. If “No”, then this option does not show up in the school’s AcadeMap Suite.
Certificate “Print For Me” orders route to:
This is the email that was set up by the Licensee earlier which is where an order will be sent to be printed by the Licensee.
Certificate downloads uses credits:
Toggle “On” (blue) if you would like “Credits” to be used when a school creates certificates and downloads or prints them locally at their school. This is usually set to “Off” unless used as a way to show value/negotiate contracts.
Certificate “Print For Me” uses credits:
Toggle “On” (blue) if you would like “Credits” to be used when a school creates certificates and sends them to the Licensee to be printed and delivered (shipped) for them. This is usually set to “On” as there is a “cost” associated with this. You can give them more credits anytime as you see fit.
Can school make ID cards?:
Toggle “On” (blue) for “Yes”. If “No”, then this option does not show up in the school’s AcadeMap Suite.
ID cards “Print For Me” orders route to:
This is the email that was set up by the Licensee earlier which is where an order will be sent to be printed by the Licensee.
ID cards downloads uses credits:
Toggle “On” (blue) if you would like “Credits” to be used when a school creates ID cards and downloads or prints them locally at their school. This is usually set to “Off” unless used as a way to show value/negotiate contracts.
ID cards “Print For Me” uses credits:
Toggle “On” (blue) if you would like “Credits” to be used when a school creates ID cards and sends them to the Licensee to be printed and delivered (shipped) for them. This is usually set to “On” as there is a “cost” associated with this. You can give them more credits anytime as you see fit.
Click on the SAVE button.
Now the school is added to your Licensee Dashboard. You can update the school’s information or change it’s Module Settings at anytime by clicking on the Manage button.
To view the school in it’s Suite, click on the Go to school button.
Next Tutorial: