NOTE: Student Field also works for Team Members.
(Click images to expand)

Click ‘Add Element’ and then click ‘Student Field’.
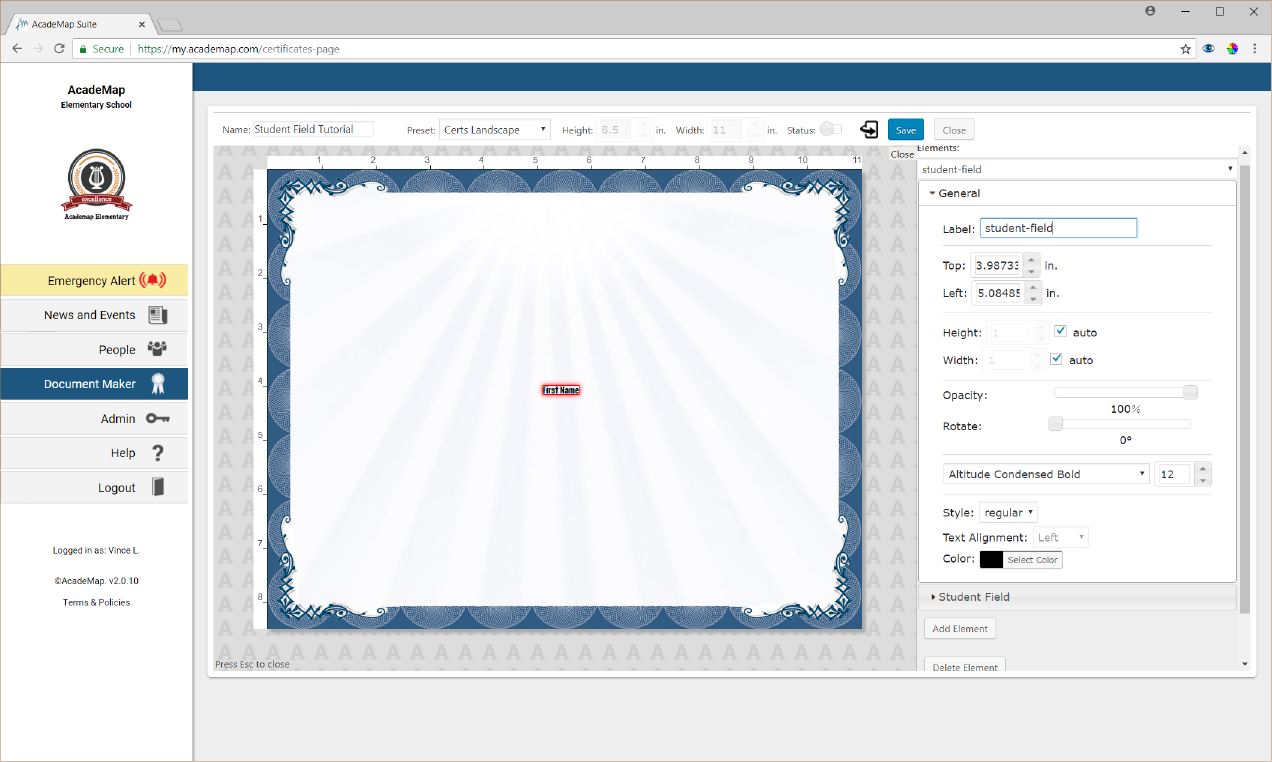
Like all new elements, it will appear in the top left corner. Drag it to where you want it positioned.
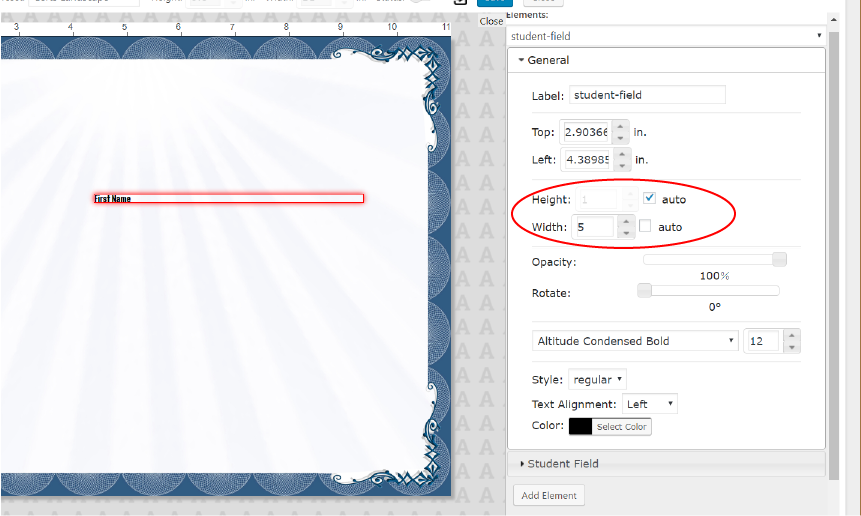
Set the Height to ‘auto’, and enter a fixed width based on how long you want the field to be. This will ensure that the text will always fit in the allotted space no matter how long it is.
This is important for things like first/last name combinations.
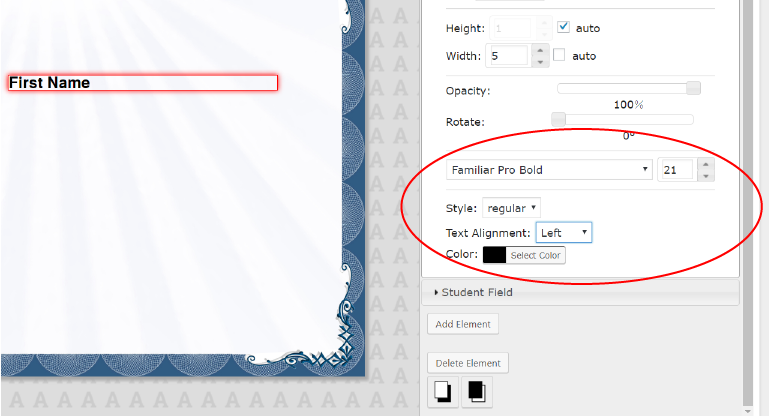
Modify the font, size, style, alignment, and color to suit your design.
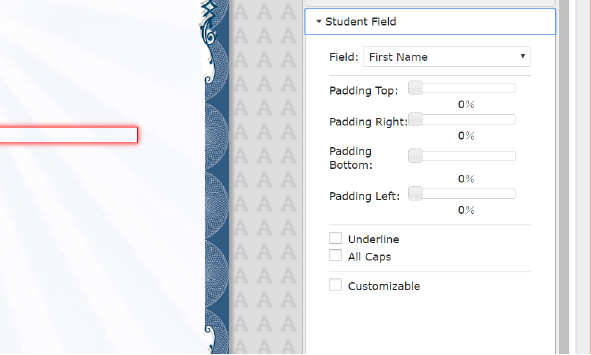
Open the Student Field settings tab.
Here you can adjust the Padding of the field area, if you want more space around the text. You can also choose to Underline the text or make it All Caps.

Click the ‘Field’ drop-down.
Here you can select which field in the student’s profile you want populate the element with.
You can do Single Fields, such as a student’s first name, last name, teacher, grade level, etc.
You can do Combo Fields, which combine two separate fields into the element. Make sure you provide enough space in your element for both fields!
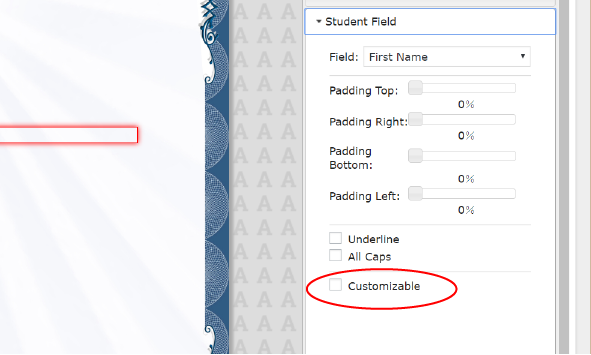
Selecting Customizable allows a user ordering/printing this document to fill this field with custom text (i.e. change or modify a name.)